Playing with the Pico Part 1 - Getting Started
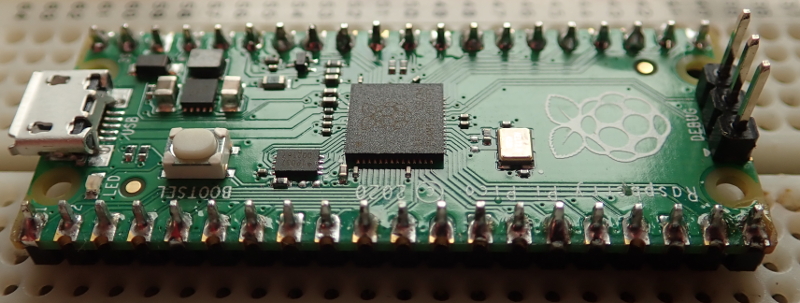
I was intrigued by the Raspberry Pi Pico when it was released. Whilst the dual m0+ cores weren’t out of the ordinary the peripherals around them offered some interesting possibilities. In particular the PIO (programmable IO) units are very unique, they have programmable state machines that can directly control GPIO pins letting you implement all manner of protocols and behaviour without having to worry the two CPUs with tight loops doing bit-banging, plus you get very precise timing control. The DMA engine was also interesting; channels can be chained together and trigger each other through memory writes and DMA transfers can be paced by the rate peripherals consume data. I wondered how far you could push the DMA engine to do complex things without needing the CPUs to do anything. At only £3.60 plus delivery how could I resist picking one up?
I’m writing this in several parts, here’s what I’ve written so far if you want to skip ahead:
- Part 1 (this one) - Getting started and first impressions
- Part 2 - Running LED PWM animations entirely with the DMA engine
- Part 3 - Using PWM to produce an audio signal
- Part 4 - Getting Acquainted with PIO
- Part 5 - Producing VGA Video
- Part 6 - Drawing SNES like sprites with a tilemap background
Getting Started
The Pico has extensive documentation. I followed through the getting started guide to install the C/C++ SDK on a Raspberry Pi 4 using pico setup. This was initially frustrated by using a 8 GiB SD Card. I ran out of space on my first attempt, removed some of the larger packages you get with a standard Raspian install (e.g.wolfram engine is over 1 GiB) and tried again. It ran out of space on the second attempt too, luckily I had a 16 GiB card to hand so after a fresh raspbian install and a third attempt at running pico-setup I was good to go! pico-setup itself takes a bit of time so be ready to wait.
Loading code can be done over USB, the Pico appears as a flash drive you can just drop the .u2f files the toolchain produces on. The Pico will reboot as soon as you copy the file over and run your code. In order to do this you need to power-cycle the board (e.g. by plugging and unplugging the USB) and hold the bootsel button. Fine for the occasional code load but it will quickly get tedious during development. Luckily the Pico has an SWD (serial wire debug) interface available on a 3 pin header which can be driven directly from a Pi GPIO interface using OpenOCD or from another Pico. I made a cable with some 3 pin dupoint connectors to connect the two (but you can always buy/use pre made jumper cables to do the same thing). My crimping skills leave something to be desired so it can be a little flaky, I need to wiggle the wires to make it work sometimes but overall it works well. With an SWD interface you get full debug capabilities and can quickly load new binaries without unplugging or power cycling anything or pressing any buttons. I can highly recommend setting it up if you’re going to develop with C or C++ on the Pico. It’s described in the getting started guide and simple to do.
For serial out you can either use USB over serial or drive serial to a couple of the Pico pins and wire them up to the Pi GPIO (or indeed anything else that understands 3.3v level serial). I’ve just used the USB option so far to minimise the number of wires I need to connect things up.
The other thing to sort out was a development environment on my laptop rather than the Pi. It works admirably well for the purpose but especially when driving my 4k monitor the laptop provides a smoother experience. I use Ubuntu 18.04 LTS. I didn’t try running the pico-setup script, instead I followed the instruction to get and install the SDK and toolchain from the getting started guide along with the instructions to install VSCode. This worked fine though you need a newer version of cmake than the one available for 18.04 LTS using apt but you can get a suitable version with snap or build your own. I needed to change the CMake generator to ‘Unix Makefiles’ in VSCode as described on the RPi forum
To connect the development environment on the laptop to the Pico I continued to use the Pi just to run OpenOCD. It connects to the Pico with the SWD interface and listens on a port for GDB to connect over the network. VSCode uses GDB behind the scenes to load and run code and implement its interactive debugging features. So I can use VSCode on the laptop to directly work with the Pico.
If you want to setup something similar when setting up your VSCode project
following the getting started guide take your launch.json from
ide/vscode/launch-remote-openocd.json in the
pico-examples repository,
you’ll need to modify it so the gdbTarget setting points to your Pi. You also
need to run OpenOCD so it listens for remote connections (by default it only
accepts local connections). This is done by providing OpenOCD with an extra
bindto command:
openocd -f interface/raspberrypi-swd.cfg -f target/rp2040.cfg -c 'bindto 0.0.0.0'
Note you should only do this on a network you trust, as any machine can now control OpenOCD on your Pi without authentication.
First Impressions
I’m definitely impressed with the pico so far, especially for the price. Whilst you can get similarly cheap boards with the faster M3 or M4 arm cores they tend to come from places like eBay and aliexpress and documentation and support can be patchy. The pico is a first party board with a very capable microcontroller and comprehensive documentation. In particular I’m impressed with the SWD interface. Given a Pi to run it from you get advanced interactive debug in a modern IDE (VSCode) for the price of a few wires. Other first party solutions to microcontroller debug tend to be pricey debug modules.
I had a few teething troubles following the getting started guide, but no huge roadblocks and people were putting solutions online for various things within a couple of days of the Pico’s release. Raspberry Pi are taking these suggestions and fixes on board and have already done a documentation update.
Going deeper the RP2040 datasheet and the C/C++ SDK documentation were very comprehensive. I did find myself delving into the SDK source upon occasion to work out what was going on or how to do something particular but the documentation still helped point me in the right direction and my dives into the source quickly found the information I needed. The SDK has a few gaps in terms of not offering an API for every possible thing you can do with the peripherals (e.g. the GPIO pins have controllable drive strengths, as far as I could tell the SDK doesn’t have a function to set these), but it’s easy enough to write the registers yourself when you find these gaps. In particular the SDK provides a nice set of structures so it’s easy to modify registers directly, especially when combined with autocomplete in VSCode there’s no diving into the datasheet to work out addresses, just use the device structs to access what you need.
I’m going to spend some time playing with the peripheral set, in particular concentrating on the DMA and PIO, seeing what I can accomplish with a minimum of code running on the CPU.